Monday, September 25, 2017

Puli Sadam aka Tamarind Rice Recipe

During my childhood in JB, our Friday evenings used to be our temple visitation at Sri Muniswarar Temple, Tampoi. Mom mostly went for prayers, I went for the yummy banana leaf dinner and other sweet and savoury offerings. Their banana leaf meal, despite being simple, is unparalleled even by the most famous banana leaf restaurants.

Sri Muniswarar Temple Tampoi is very famous and rich in history, which you can watch here. To this day, their Thaipusam celebration is the most grand in the southern part of our country.

One of my favourite and most fond memory of their offerings is what we used to call 'sour rice', which is actually called puli sadam in Tamil, loosely translated to tamarind rice. Some fun facts here, 'puli' also means tiger in Tamil, it is rather amusing to call it tiger rice, furthermore, it even boosts the colours of a tiger!

And coincidentally, this is also what most Indians would specially prepare for someone who is expecting, among other things of course, but this is extra special as it is sour in taste. Which means I have had good memories of stuffing myself with the sour goodness when I was carrying both the babies.


As the name suggests, it is basically plain rice flavoured with tamarind, and as anything Indian, accompanied by a cocktail of spices. I have not got the exact amount of spices here, but typically it is very small amount about 1 tsp. Usually you don't need a big amount of whole spices to get the taste, so yes, the small amount is sufficient. Here is:

You Need:
2 cups of cooked rice
2 tsp tamarind paste
some roasted peanuts
some curry leaves
some dry chilli
salt
jaggery (I used gula Melaka)
some mustard seeds
some fenugreek seeds
some urad dhal
some oil
some asafoetida
some channal dhal
some turmeric powder
3/4 cup water 
Method:
1) Heat some oil in a pan. Add fenugreek and mustard seeds. Let it splutter.
2) Add the dry chilli,  curry leaves, asafoetida, turmeric powder, urad dhal and channa dhal.
3) Keep stirring till the channa dhal starts to brown.
4) Add the tamarind paste, and add about 3/4 cup of water. If you are using regular tamarind which needs to be soaked first, you don't have to add extra water here.
5) Give it a stir and let it simmer.
6) Add jaggery or as I did, gula Melaka. Check for the taste, and add salt as needed.
7) Simmer till the mixture reduces by half. Now you can add the rice and give a nice stir, halfway turning off the fire, add the roasted peanuts. Keep stirring to get it evenly coated. 


Serve with papadam and yogurt, or just on its own, there are multiple bursts of flavour in your mouth as you savour it. The roasted peanuts, channa dhal and urad dhal really give different experiences of crunch and munch, if there is even such a thing! And then bursts of mustard and fenugreek seeds keeps you rooted to the Indian taste.

Happy trying!

Thursday, September 21, 2017

Cake Indulgence at China House

The silver lining about moving to a new town is every outing is a new experience, and being in Penang, every outing for a meal is like a vacation. There are so many choices here. You want street food, food court, fine dining and franchise (although I do hold some grudge for them having only one McDonald's outlet in Seberang Jaya, and then there is no Burger King around here).

In conclusion, you want to eat, you have it. No questions asked!

Like a few months ago, Mr Hubby visited this cafe that served impressive array of menu, with thousand types of cakes. When he gloated to me about it, I thought to myself it is virtually impossible. And then he goes on and on how it takes from the front part through the back alley right into the row at the back. Again I was thinking, is Penang even that big to have something that sounds so well spread? And then I was told it is actually is a cafe, bar, wine bar, art gallery, has live bands, and like 101 other things.

Curiosity killed the cat, so although I ain't no cat, we had to visit the place right the next weekend, like pronto!

My, oh my! Was I in for a surprise, shock, amazement, whatever you call it, it is not enough to explain the feelings, especially when you love everything cakes. Yes, cake'S'. Here's how:


This is one section, another chilled section on the left, not in pic. And get this, they keep topping up the different cakes and goodies. It's like diabetes galore, diabetes that I want to embrace.

If that this point you are not amazed enough, feel free to leave this space. 

Ok no, please wait, the fun does not stop here.

Their best cake is the tiramisu, and you have the option to take alcoholic and non alcoholic. No prize for guessing which one I jumped upon. It is absolutely a must try! Soft cheesy layer in between soft spongy cakes, topped with icing and what tastes like granola.  


Second best is the espresso walnut cake, the square shaped on the right.

Then there's moist buttermilk chocolate cake, again yummy!

On the top right corner is the salted caramel cheesecake. Too salty for my taste. On the top left is the gourmet hotdog with fries. Things we do to satisfy kids.


Some close ups, from top to bottom is salted caramel cheesecake, espresso walnut and moist buttermilk chocolate cake.


Hope you did not expect me to list out all their cakes, because no I am not doing it, but just mentioning my favourites. As we all are quick to jump onto our food when it arrives, you will notice I have very few candid shots. The more artistic ones are by My Hubby who takes pride in the Iphone6 skills.


Also thanks to my non-photographic skills, the accounts and photos here are actually compiled from our multiple visits there. 

If you noticed, our table came with square white papers, sophisticatedly known as 'mahjong papers', and every table is equipped with good amount of crayons. Basically they tap into your creativity as you see heaven in every bite of their God-sent cakes.

Thanks to our gastronomically superior experiences we've produced quite a few masterpieces while indulging, especially the kids, and oh, notice the red velvet cake as you immerse yourself into the art.


Tiramisu, chocolate decadent and red velvet cakes, at your service!


Art too.

See how all the hands get into producing art.


And the best art award has to go to the portrait My Hubby created, full credits to him, Iphone only took the picture. So that's me, as conceived by Mr Hubby.


The selected artworks will be displayed at their cafe and also the art gallery, and seeing the collection they have there, people are pretty creative and arty after their cakexperiences. The last time we went there I tried to spot my portrait but couldn't find it. Looks like we need another trip to China House to indulge and submit another artwork!

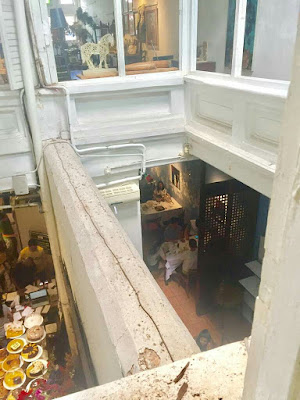
Here's Mr Hubby pulling more Iphone6 tricks, an ariel view from the art gallery on the second floor. I am sitting on one side and there are cakes on the other side.


Taking a walk from the front to the back is really an interesting experience because the deco, the setting, and the graffiti brings you into different moods, ambience, and that vintage feel that you forget for a short while that you are in the 21st century.


And here's some of our pics. My Hubby was doing the beard trend, till the cakes got into them. Not bad if you want to have some cakes to-go!


The boys and me, right before we leave the place. I can't tell if my eyes are opened or not, regardless, awesome cakes, I was probably high on cakes!


So now you know, if you are in Penang where are the best cakes. In fact, once you've had China House cakes, everything else just pales in comparison. One might feel the pricing in on the higher side, but the pieces are oh-my-big-enough-to-drown.

China House is addictive like that. Try it, if you dare!

Chicken Butter Masala Recipe

Here's me finally updating the Chicken butter masala recipe from 2 weeks ago. It goes awesome with homemade naan or just some plain basmati or regular rice.


Ingredients
  • 500g chicken breast
  • 100g yogurt
  • 2 tsp garam masala
  • 4 tsp ginger garlic paste
  • 2 tsp chilli powder
  • 2 tsp cumin
  • 2 tsp coriander
  • 2 tsp turmeric
  • 50g butter
  • 1 tbsp tomato puree
  • one, diced onion
  • cardamom pods
  • 1tsp ground cloves
  • 1 cup milk
  • handful chopped coriander
  • to taste salt
  • some cooking oil
Method
1. Cut the chicken breast in bite-sizes.
2. Add the 100g yogurt, 1 tsp garam masala, 2 tsp ginger and garlic paste, 2 tsp chilli powder, 1 tsp cumin, 1 tsp coriander, 1 tsp turmeric and some salt. Mix well and marinate for 30 minutes to an hour.
3. Add cooking oil into a skillet, and pan fry the marinated chicken breast pieces. Set aside.
4. In the same skillet, add the 50g butter. Add the diced onion and let it sautee. 
5. Add the 1 tbsp tomato puree, 2 tsp ginger and garlic paste, cardamom pods, 1 tsp ground cloves, 1 tsp cumin, 1 tsp coriander, and 1 tsp turmeric.
6. Add about 1 cup of water and let it simmer. Add salt to taste.
7. Add 1 cup of milk and simmer it till it thickens. You can add more water and/or milk to get tour desired consistency and amount of gravy.
8. Sprinkle chopped coriander leaves and serve.


I gotta warn you, the moment you are done pan frying the pieces of meat, you can try some, and after that you will not be able to stop yourself. In this case, it is really wise to prepare a little extra to ensure you have enough for the dish later.

Happy trying!

Sunday, September 10, 2017

Cheese Garlic Naan Stovetop Recipe

I love to eat roti or pratha. Naan and even kulcha for that matter. And no, it is not the same as the regular roti canai you get locally in Malaysia. Even most of the capatis found locally is not the real deal, so you get what I mean.

It was a while since I cooked on a Sunday, and that butter chicken recipe I found online was calling out to me, so it was the perfect way to spend my Sunday morning with. Also I was craving for a real good naan. Most of the naan we get outside are either overpriced or too dry. I wondered what it took make naan at home.

I'd like to emphasize that this time I was wondering how to make naan at home, for real, and not from accidental dough that did not rise. In case you are wondering what am I talking about, 3 years ago, my yeast failed me, and the cinnamon roll dough did not rise, so I made 'em into naan, blog link here.

Thanks to that mishap I learnt that I should always always and always activate my yeast before kneading, blog link here. Secondly I also learnt that those dough can work so well as stove top flatbreads.

It was definitely something that can be done. I took a while searching recipes and methods online. Mostly used baking method with hot cast iron or baking tray for the 'tandoor' effect, however it did not seem very convenient with the steps, and I was also vary of burning my hands with the constant 'turning' over of the naan, and I have a good amount of previous scars from the oven already.

I decided to use my capati cast iron flat pan, or as we call it, the 'tawa'.


Here's the recipe I finally used, with awesome results! My recipe is for breadmaker kneading, as much as I hate manually kneading, I also don't fancy the detailed write-ups of manual kneading. Luckily for me the BM does it till it rises the first time.

You need:
For dough
4 cup of all purpose flour
1.5 cups of warm water
1.5 tsp yeast
some salt
1 tbsp sugar
3 tbsp plain yogurt
2 tbsp butter
For filling and topping
mozzarella cheese, shredded, or cut into small blocks
chopped coriander
chopped garlic
2 tbsp butter, melted
Method:
1) Activate your yeast by mixing it with warm water and 1 tbsp sugar. Let it sit for 10 minutes and if it foams, it is ready to go.
2) Add the activated yeast with the rest of the ingredients (except butter) into the breadmaker and start it on kneading mode.
3) Once its incorporated, add in the butter and let it continue kneading till the machine stops for first proof.
4) Let it proof for 1 hour.
5) In the mean time, melt the 2 tbsp butter. Mix chopped garlic and coriander into it and set aside.
6) Once the first proof is over, oil a flat dish to store individual dough.
7) With an oiled hand, start forming smaller dough about 3 inches wide each, fill the dough with mozzarella cheese and seal it into a nice round ball. Place the dough balls onto the oiled flat dish.
8) Start to heat up the cast iron pan. Oil the surface slightly to avoid the first dough from sticking.
9) On an oiled surface, place individual dough press down with your palm to form into flat circles. You may notice it tears up creating holes, it is fine to leave it so.
10) Place the flat circle gently on the hot pan, and let it toast for 1 mins plus.
11) You will notice bubbles forming, this is good sign.
12) Turn it over and brush the butter/garlic/coriander mixture on top of it.
13) This time cover the naan with a small cover right for it's size. Let it toast for 2-3 minutes.
14) Repeat steps 9-13 for every dough ball.

It is rather lengthy but it actually is very simple, just the few extra steps from making capati, one reason why I enjoyed making it so much and will do again next time!


We had the naans with butter chicken masala, mint coriander chutney and sliced raw onions. At the risk of sound immodest I have to say that these are the best naans I had, even better than chewy and dry ones you get at most restaurants. I am surprised with the soft outcome of this pan toasted naan. The earlier accidental dough that I made into naans were more fluffy thanks to the egg content.

I had kept aside some of the dough, and had some leftover butter chicken, which later in the evening I upscaled them into pizza naans! I had also included the butter herb mixture into the pizza base.


Happy trying!

Tuesday, June 20, 2017

Indian White Mee Hoon Recipe

During my childhood I had the opportunity to know this wonderful and kind neighbour who was almost like a grandmother to me and my siblings. She lived two doors away and would come rushing to the house if either one of us was sick. Being a former nurse, she knew lots of remedies. On top of that she was a wonderful cook, the type that creates memories of countless comfort foods.

Both our illness season and birthday memories were filled with 'Aunty' bringing lots of gifts, and food so good that even the lack of appetite would give in to.

One of the fondest memories of her cooking is her wajik. Since she knew I loved it so much, she would make big batches just for me. I would just chill it in the fridge, and eat as I please. I did try to make it at home, but really never got any close to how she made it.

Another memory of her speciality is her Indian white mee hoon. This is very different from the regular mee hoon that is seasoned with all kinds of sauces that makes it reddish brown. Over here you get the flavour from spices, curry leaves and dried chilli. When recently I was searching for the best recipe for this, I also discovered that dried anchovies and prawns also make among the sautee, that gives it the rich aroma and flavour.

Since then, I make it regularly, and with reasonable vegetables added, it is very much a balanced meal on its own. Usually for the white mee hoon we use vegetables that can cook with the sautee, and nothing that gives crunch like beansprouts or bak choy. I am not sure quite why but I just have a feeling soft cooked vegetables is the essence for this mee hoon.

You need:

dried anchovies and shrimp, soaked in warm water for 30 minutes.
1 large onion, sliced
4-6 cloves of garlic, chopped
some ginger

mee hoon
carrot, sliced thin
chinese cabbage, sliced thin
mustard seeds
dried chilli
curry leaves
coconut oil
salt to taste

Method:

1) Once the dried seafood is soaked well, drain the water and pound it together with ginger. Leave a aside.


2) Soak the mee hoon in tap water.
3) In a pan, heat up some coconut oil.
4) Once it is hot, you can add the mustard seeds, curry leaves and dried chilli. Also add the onion, let it sautee and spices pop a while.


5) You can add the pounded dried goods, and give it a nice sautee till brown and aromatic.


6) Add the carrot and cabbage and let it cook for 10 minutes.


7) Soon after you can add the drained mee hoon, and the chopped garlic. Season with little salt, as the dried seafood is already salty. Give it a nice stir and let it incorporate for about 10 minutes of stirring and cooking.


I had also fried some eggs separately and added into the mee hoon dish. I like this way that it does not coat the mee hoon strands. Do not be afraid to use more curry leaves, I was being gentle to my plant as it is picking up from a recent infection. Happy trying!

Journey To Pantai Kerachut

Last school holidays the boys had a trip to Pantai Kerachut with their taekwando team. At first it sounded all so fun with the sun and sand, only later we got to know that Pantai Kerachut is deep inside the National Park of Penang. It also turned out that Pantai Kerachut is actually a secluded beach with jungle terrain and is actually famous for wildlife viewing, including seasonal nesting turtles.

The boys followed their group that left earlier in the morning. It was a first experience for them travelling somewhere without us parents, just by themselves, and we were glad to let them have it, while we followed behind in our car, taking our time, grabbing some local delight on the way.

We had our speedy date, having breakfast 2 times, yes you read it right, acting all touristy in Georgetown. We first had some dimsum, and later we had some local toast at Lollipop Ropitiam. And yes we were free enough to take a few selfies, wefies, whatchacallit.


Soon after that we got to driving towards the National Park. It took a while, passing Tanjung Bungah, Batu Ferringi, practically everything, till we reached end of the world, really, it was End of The World Seafood that we saw, right before reaching the fishing village that later led to the National Park of Penang.


Just as we were registering at the office, we were warned that the path to Pantai Kerachut is not simple, and we ought to be properly dressed and equipped with water. and luckily we were so.

And off we went.


And went.


And went. Yes, the trekking path was like never ending, with challenging terrains and all kinds of scary jungle paths that I wouldn't know to name.

The first 15 minutes I almost lost my breath. What I initially thought was 40 minutes walk, turned out to be a very challenging 2 hour path!


We passed a dug out hill, some pit stops, sign boards with facts that made our pit stops informative,  a few clear water creeks, and somewhere before the beach there's a meromictic lake, which is pretty rare due to its two layers of salt and fresh water that do not mix. This is one of the useful information that you will find among the signages.


Really, we were not prepared to this, no we did not sign up for this either!


As we struggled, I kept thinking how did the kids make it through this path with their group. Then again, recalling back the amount of energy they usually have, this path seemed very fun for them. Also they were in a large group, so it won't feel as taxing as us two tired souls felt. And oh, it was a good thing we ate breakfast like there is no tomorrow, because, while the kids will have food provided by their group, we won't have any eating options at Pantai Kerachut.


Throughout the way, there were also distant markers, which were informative, but somehow the real time taken felt much longer than indicated there. Those were the longest 1 hour 20 minutes, 30 minutes, and 5 minutes of my life. Oh wait, maybe that is not true, I might have had more agonizing times in my life, like going through 14 hours of labour.

After what felt like 10 hours of walking, 2 bottles of water, and being drenched with sweat, we reached our destination. Super yeay!

And yes, Pantai Kerachut is an amazing sight indeed. Clean beach, clear water, and to think we were at the other side of the island that we always view from our place, it was just fulfilling. I must mention that there is no phone signal through most of the jungle trekking, and zero at the beach!


Soon after we decided, we are not trekking back. No Sir, we are not. Luckily there were motorboat operators who hover that area for potential passengers, so we booked one motorboat ride back.

We left soon after the kids were done with the activities. As beautiful as it was there, we were totally dying to be back to land where there's convenience and 4G.

See the t-shirt wordings, 'Spirit to practice, more than just self-defense'. Indeed, so much of spirit to practice when going through the path to reach here. Taekwando is not just about self defense. This event proved it right!


As we were all ready to just end this trip and be back to the jetty and head to the car, the motorboat operator made it more memorable for us. He took several stops to show us some famous rocks by the shores. Here, you can see a rabbit resting, can you see the eyes and ears pulled back on the right side?


And then there's this flat rock that looks like a turtle, head on the right.


And the finale, crocodile rock, which looked more like a dinosaur head to me.


What an expectedly and amazingly fun trip it was. Sure it was tiring as hell, testing our physical and mental strength, and once over, we only felt grateful for having this wonderful experience.


On the way back we saw this other famous beach called Monkey Beach, it has some water sports, food and drinks all available. We will surely make a trip here next time, by motorboat that is! No more jungle trekking!

Sunday, May 21, 2017

Dry Chilli Sambal Recipe

We all love pan mee at home. Specifically the chilli powder that comes along with the pan mee dish. It's always been a wonder for me how they make the dry chilli sambal that is crunchy and so flavourful. Little did I know that instead of just the glorified chilli in the name, dried shrimps play a huge role in making it.

Lately I also began to see online sellers marketing the dry sambal, advertising how it is perfect to be eaten with virtually anything, even plain rice. Now this is when I started making connections with the pan mee chilli, and yes, that is the one.  Without realising I have turned into this aunty who can make anything at home, and was determined to make this at home from scratch.


I asked Mr Google for some recipes, and I found out it is actually a Nyonya delicacy 'hae bee hiam'. I felt somewhat proud to be able to attempt this. After comparing a few recipes, I came to the conclusion that this is indeed the usual chilli paste that we make for sambal, with added dried shrimps to the kick. All it needs is some good seasoning and cooked from its liquid form till it dries into fine particles of its original ingredients. Sounds like a lot of hard work. Surprisingly, it is not. And on top of that, you get a very wonderful treat the end of it. I must warn you though, it is so delicious, you can eat it on its own, but the spoonfuls!

I decided to make this dry chilli sambal inspired from my own sambal paste, that is with turmeric and lemongrass.

Here's what you need:
A handful of dried chilli, soaked
3 fresh red chilli
6-8 shallots
3 cloves of garlic
a handful of dried shrimp, soaked
3cm fresh turmeric
1 stalk of lemongrass
some oil
salt
2 tbsp brown sugar

What you need to do:
1) The soaked ingredients works best with warm/hot water. 

2) Once you have soaked the dried shrimps and chilli for 15 minutes, you can strain the water, and move all ingredients (except salt/sugar/oil) into the blender, add some water and blend it fine. 


3) Pour the blended paste onto a hot pan and start cooking. Add the sugar and salt at this point.

4) Keep stirring as it cooks. I did take random breaks in between from stirring, especially if there is still some liquid form, it takes a while to evaporate. But once it has dried up, you can't take break from stirring, otherwise it might burn right there and then. Also frequent stirring ensure it is evenly cooked.


5) Halfway there, you can add the oil. I like to add this point because it helps in browning the paste into nice crunchy powder.

6) And yes, keep stirring, till you get this. And you are done!


Once it has coolest down, you can transfer it to your desired container, or just start eating right away!


I must confess, halfway as I was stirring it, I did think to myself 'ok, so this is not working out' because I did not see it drying up as quick as I thought it would, but patience really pays off handsomely. At the end of it you will tell yourself, it was so easy I'd do it again and again!

The very next day I got plan pan mee into work, and this is how we had our chilli sambal, with spinach noodles, minced meat, and homemade kimchi soup!


As I bit into the noodles with the minced meat, the crunchy bits of chilli sambal reminded me, yes I did it! Something tells me this is going to be a must-have condiment in the house! Happy trying!


Taiping Zoo Trip For The Family

Every time we drove up and down between Butterworth and KL we would see the Taiping Zoo signboards. We would remind each other to make a trip there, especially for Jeev who is a total animal lover. He talks, draw, and plays everything animal, and the last zoo trip we had to the National Zoo in KL was a total hit!

A few months ago, when we were feeling the need for a quick break, it was Zoo Taiping we went after! For the first time ever, we planned a little picnic and prepared some nuggets and sandwiches from home. There was a creek by the carpark, so we decided to 'unfold' our picnic right there. Although a short one, it definitely was very memorable as it was a first.

The boys were happy to pose by the creek, under our supervision, because it was rather steep.


The moment we entered, we had a family photo taken, and not missing the memories, we had to make a print of it. Coincidentally, we all wore shades of blue.


I've got some odd shots of the boys and hubby, generally the zoo of boys in a real zoo. Jokes aside, it was a good time to visit as it was not any holiday season, so there was lesser crowd. The zoo is simple yet well managed and clean. The tram ride can take you around the zoo in less than 30 minutes, after which we decided to take a walk for the kids to take closer and better look.


Luckily we had prepared our picnic supplies because unlike the National Zoo, Taiping Zoo did not have much options of food at the stalls. We had ice cream instead, it was an off day for the kids after all, so everything is allowed.

And here's the boys (including biggest boy) with Alex the lion from Madagascar. Despite being a huge fan, Jeev is still afraid to go close to any kinds of large mascots.


Notice the GI Joe haircuts on the kids? Well it was a hairstylist debacle which happened one night before, well it is history now. They are back with their stylo mylo hairstyles.

We had enough time to drive around in Taiping town, it is remarkably well kept, well manicured landscaping, and not to mention the natural greens everywhere. Historical old buildings are well preserved while adequate development is concentrated in the newer areas.

At night we had plans of having the much celebrated seafood in Kuala Sepetang, and indeed we did! Kuala Sepetang is about 30 minutes drive from Taiping town. Thanks to blog reviews, we decided on Restoran Tepi Sungai. It is indeed 'tepi sungai', by the river, with the view of the fishing village.

While waiting for the food, we had the chance to catch a few eagles flying about, and this is without even the eagle watching. I reckon the eagle watching activity provided there must be really interesting to see them closer.


As usual, I am not quick enough to catch good photos of the food, but I must say, the food was so delicious, and very very reasonable. We had some fried prawns, baby crabs, sweet sour prawn, and steamed fish.

All in all, the next morning was another foodie journey. We went to a local food area near the King Edward VII school. It was another adventure trying the curry mee totally different from how we get at other places. We also tried the Bismillah Cendol, which was very disappointing, especially for us ex-Klangites living in Penang, it does not even make it to the list. Please avoid!

Since moving to Penang, our short trips to PD were something we missed, but hey, this trip to Taiping, totally nailed it!

LinkWithin

Related Posts with Thumbnails