Monday, June 30, 2014

Adults Play For Free

We all have heard of the marketing gimmick, 'Kids Eat Free'. Those restaurants are our favourite destination when dining out, because while being kid friendly, it is also pocket friendly when you have kids with temperamental appetite that changes favourite foods overnight. Also makes a great take-out meal for later feedings.

But did you also know that adults can play for free at most indoor kids' playground? Yes, it is the biggest conspiracy theory in the light of parenthood, the unspoken truth, and perhaps utilised so much yet no one speaks of it.

This is particularly true if you have kids below the age of 2 years. You sure need to be by your kid's side for full supervision to ensure smooth play time. And if you have kids above that age, you could pretend that they are nervous, and stick to their side. This could perhaps go on till the age that the kids actually chase you away for coming in the way. That, my friend, is the end of it!

It definitely pays visiting a new and higher end play area. For one thing the equipments are new, sturdy and of infinite amount of excitement. Yes, I am talking about excitement that involves even the most adult person. Who doesn't feel like a kid in a candy store everytime seeing a pool full of balls, and I am not talking about the kids. It just gets too tempting not to jump into it, that too while pretending to be going after the kids. 

Notice how lost and unguided the boys look without parental supervision?


And now totally illuminated with the presence of a (freeloader) parent.


The cassia seed playground is definitely a favourite for the boys. They got down and dirty and brought back numerous seeds back home in their pockets, pants and diaper, yes true story!


2 kids and ... another kid!


Spot the kid!


Now spot the pretending kid.


We had the boys making a dive into the pool like a real swimming pool of water. I, on the other hand, kept the diving subtle, carefully making sure balls don't disappear out of sight. We, adults, played for free afterall! Apart from the fun, one plus point is the school socks we bought for ourselves, hubby loves wearing it for work!

Thursday, June 26, 2014

Chicken Tenders With Honey Mustard Sauce Recipe

For as long as I remember, I always failed deep frying with flying colours. Even my other half who does not cook has deep fried in effort to salvage my failed product, and did much better!

For the benefit of my kids' demands and developing taste buds, I thought it would be awesome to be able to recreate chicken tenders right at home. Sure I have made salmon potato cakes and meatballs before, but they always steer away from deep frying, instead take on the shallow frying or baking route.


So when my recent effort in deep frying chicken tenders came to a complete success, it was more than just that. It is a milestone.

And there is the recipe for you:

You Need:

800g chicken breast, cup into strips
Oil for frying
2 eggs - beaten
1 cup all purpose flour
2 cups bread crumb
some paprika powder
toasted ground cumin
salt and pepper to taste

Chicken Marinade:
some Worcester sauce
2 tbsp corn flour
salt and pepper to taste

Honey Mustard Sauce:
1/2 cup mustard sauce
1/2 cup honey
1tbsp mayo
1tsp lemon juice
salt and pepper to taste

Method:
1) Marinate the chicken for 30 to 60 mins.
2) Prepare the honey mustard sauce by mixing all the ingredients together.
3) Beat the 2 eggs in a bowl.
4) Measure the flour into another separate dish, shallow and convenient for dipping. Season with toasted cumin.
5) Measure the bread crumbs into a pie plate or shallow bowl and season with paprika, salt and pepper.
6) Dip the chicken strips into the flour, the beaten egg and then dredge them into the seasoned bread crumbs.
7) Fry in the hot oil for 6 to 8 minutes, until golden brown.

You could very well omit the toasted cumin powder if you do not have any. Garlic powder works well too in you like the additional flavour. Also you can do a second dipping of egg and breadcrumbs for extra crumbs. 

Here is the testimonial of the chicken tenders. I swear I did not ask him to pose that way. It is pure expression on his own.


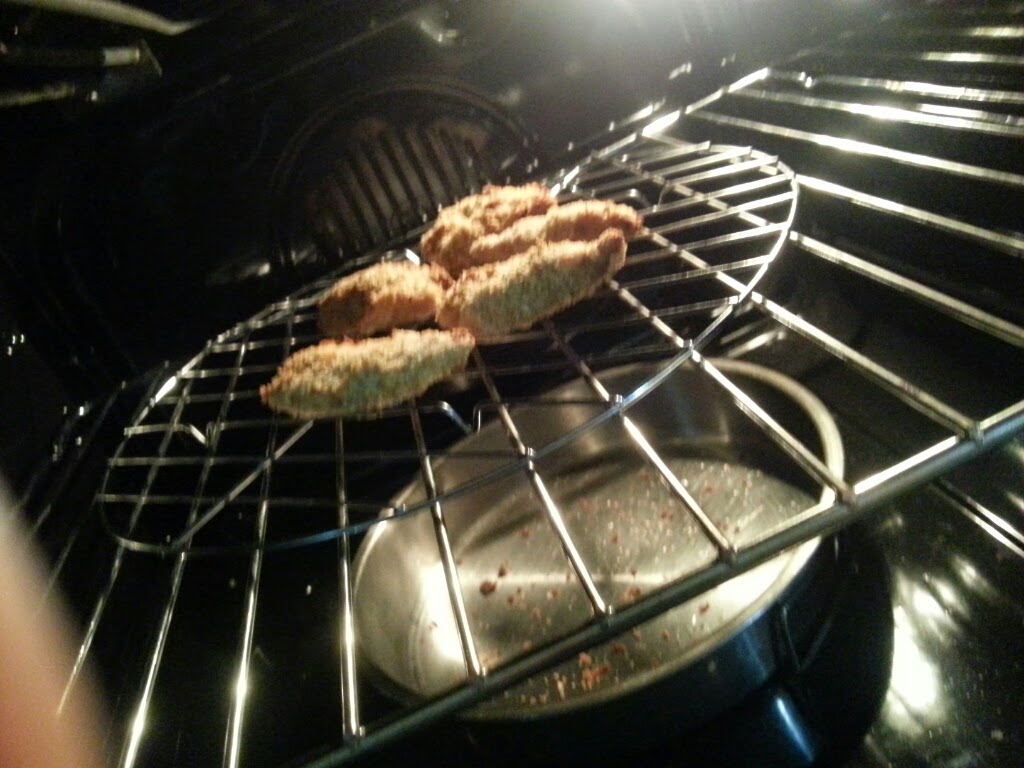
With the recent air fryer craze, I also conducted a small experiment of baking the chicken tenders in the oven on the grill tray, just to compared the differences with the deep frying effect. I had sprayed the chicken tenders with cooking spray before baking.
 

The result? Air-baked chicken tenders were slightly crunchy, but a little dry to the taste. Also the browning effect is not that even. I have seen air fryers with better browning effect. Here is a comparison picture for your kind information.


So here is putting another item on the wishlist... an air fryer... Mr. Hubby... are you listening?

Wednesday, June 4, 2014

The Maverick Dough

After being on cinnamon-sugar high with my cinnamon roll attempt a few days ago, I was rather energetic to go ahead and make another batch so that the 'little girl' could taste it. However fate had other plans, and my yeast failed to rise the dough and left me to nothing but much embarrassment.

At first I just thought of deep frying it into bathura, a deep fried flat bread. Then I decided against it because I simply suck at deep frying. It did occur to me to just throw the dough away, being convinced it is of no use anymore if it does not rise at all, but I just thought of giving the dough one night's stay in the grand fridge.

After sleeping over it, and getting some ideas here and there, I decided to give it a go at making capati or pratas instead. The boys always love those. However, deep inside a part of me was kinda skeptical wondering if the dough would work being pan-toasted.

I was expecting the regular prata rolling experience but was I in a serious surprise! The dough, being a bun dough, was rather elastic, and did not bow down to my intense rolling over and over again. Then I had to resorting to pulling and pressing it to shape to desired size. Somehow I started flinging it a bit to help it expand.

And it struck me, no wonder roti canai is never rolled out, but always flung about. Its also made of the all purpose flour like my dough. And somewhere after my second prata, I realised that letting the flattened dough rest a while gives it a little more rise and makes it more fluffy.

It was all smooth sailing after that. I got into the rhythm and was able to make it more round shaped instead of the map of Australia or even Singapore!

I was so nervous letting my 'audience' have a taste of this little experiment, but guess what, the boys started eating even as I was making the pratas. Reminded me so much of my days at mom's place where she just churns out those beautiful pratas while we roam around her eating as we chat.


I felt more confident only when I had a taste of it on my own. It actually tasted like a damn-good naan! Fluffy, slightly sweet, and ever so rich and luxurious tasting due to the egg content. Who would have thought a disastrous attempt can turn into such a yummy meal?! It is like a fairy tale, the ugly duckling who grows up to be a beautiful swan... this maverick dough with malfunctioning/lazy/failed yeast turned out to be superb naan breads!

To go with the flat breads I had made this red lentil (masuri dal) stew with potatoes, zuchini and chinese cabbage. Lately Sanju is crazy about anything dal... and so victory was mine!


Now I am kinda scratching my head as to how to reproduce this disastrous dough so that I can get the same naans?

Cinnamon And Cream Cheese Rolls Recipe

I love cinnamon rolls. As much as I wish, I don't make them often, purely for health reasons, as I am the one to give in to the temptation gobble down every bit. So it has been a while, and I had got the inspiration to use cream cheese for filling as well. This way with one process we get two types of roll. How economic is that, for the taste buds, that is!


This time I was also able to perfect my recipe, given all the practices and exercises in kneading and portioning. And this time I also had a trustee assistant at hand, who not just helped me in preparing but also helped me in taking step by step pictures for your benefit (Disclaimer: its too tempting, control yourself).

And here goes:
You Need:

320g all purpose flour (APF)
50g sugar
50g butter
130g milk
1 egg
5g yeast
a pinch of sugar

For the filling:
60g brown sugar
30g butter
half tsp cinnamon

50g cream cheese
20g castor sugar

Method:

1) Mix APF, salt and sugar in a mixing bowl. Make a well in between and add the milk, yeast and egg. Knead till fully incorporated and then knead in the butter. Make into a smooth dough and cover it to proof for one hour.

2) Mix the brown sugar, butter and cinnamon till smooth and keep aside.

3) Mix the cream cheese and castor sugar till smooth and keep aside.

4) Take the dough and roll it out to a approximately 30cmx40cm.


5) Spread the cinnamon mix on the left half, and cream cheese on the right half.


6) Roll the dough towards yourself, pinching the ends.


7) Cut it into 8 equal sizes.

8) Arrange each roll on a greased baking dish.

9) Proof for another 30 mins and then bake in a preheated oven at 180C for 10 to 15 minutes.


You can always trust APF to make really soft and yummy rolls. And those cream cheese rolls rock, almost taste like yogurt filling. While the brown sugar gives sticky and sweet flavour, the cream cheese filling has all soaked up into the bun giving it a sweet and sour taste. It was amazing having it over a cup of ginger tea with the girls. Try it!

LinkWithin

Related Posts with Thumbnails